Step-by-Step Guide to Changing a Truck Tire Bead
Changing a truck tire bead is a task that requires attention to detail and an understanding of the forces involved. The bead of a tire is the edge that sits against the rim, and creating a proper seal is essential for safe operation. Without the correct technique, the rim or sidewall can be damaged, leading to air leaks or structural weakness. This article outlines a systematic approach to breaking the old bead and seating a new tire, focusing on the tools and methods that help minimize risk during the process.
Truck tires, especially those on heavy-duty vehicles, are designed to endure substantial loads and high pressures. The bead area is reinforced with steel wires to maintain a tight fit on the rim. When a tire needs replacement, the bead must be loosened without bending the rim flanges or cutting the rubber. Using a dedicated bead breaker tool, combined with appropriate lubricants, allows the technician to separate the tire from the rim in a controlled manner. The following steps describe a method that can be applied in a workshop or field setting, provided the necessary equipment is available.
It is important to note that every tire change involves variables such as tire size, rim condition, and the type of bead breaker used. The guidance offered here is based on common industry practices and is not a substitute for manufacturer-specific instructions or professional judgment. Individuals performing this work should have appropriate training and safety gear, including eye protection and gloves, as the procedure can generate sharp edges and high forces.
Understanding the Bead and Rim Interface
The interface between a truck tire bead and the rim is a precision fit. The bead consists of a bundle of high-tensile steel wires encased in rubber, forming a hoop that locks into the rim’s bead seat. On the rim, the bead seat is a tapered surface that helps the tire seal as air pressure increases. Over time, corrosion, debris, or rubber adhesion can cause the bead to stick firmly to the rim, making removal difficult without specialized equipment.
When a tire is inflated, the bead is pressed outward against the rim flange. Deflating the tire relieves this pressure, but the bead may still remain stuck due to bonding forces. Breaking the bead means applying enough force to separate the rubber from the metal without distorting the rim. The rim flange is particularly susceptible to bending if excessive force is applied in the wrong area. Therefore, understanding the geometry of the rim and the location of the bead seat helps the technician position the bead breaker tool correctly.
Another consideration is the presence of rust or oxidation on the rim, which can increase adhesion. In such cases, a penetrating lubricant may be applied before attempting to break the bead. However, the lubricant used during the seating process is different and must be compatible with both rubber and metal to avoid long-term deterioration. Proper preparation of the rim surface, including cleaning away debris, also contributes to a smoother procedure and reduces the chance of damage.
Preparing the Tire and Wheel for Bead Breaking
Before any force is applied, the tire must be fully deflated. Removing the valve core is the most effective way to release all air from the tire. On a truck tire, the valve stem is typically mounted on the rim, and a core removal tool can be used to unscrew the core. It is advisable to verify that no residual pressure remains, especially if the tire has been run flat or has internal damage. Once deflated, the wheel assembly can be removed from the vehicle and placed on a stable surface, such as a tire mounting machine or a clean, level floor.
Lubricant plays a dual role in bead changing. During the breaking process, a light application of a rubber lubricant or soapy water can help reduce friction between the tire bead and the bead breaker tool. During seating, a thicker lubricant is used to allow the bead to slide into position without tearing. It is important to use a lubricant specifically formulated for tire mounting, as household oils or greases can cause rubber swelling or corrosion. The lubricant should be applied evenly along the bead area and the rim’s bead seat before attempting to separate the tire.
Inspecting the rim for damage is a necessary step before proceeding. Cracks, deep rust pitting, or bent flanges may indicate that the rim is not suitable for reuse. Attempting to break the bead on a compromised rim can worsen the damage or create a safety hazard. Similarly, the old tire should be examined for signs of sidewall cracking, bulges, or foreign objects embedded in the tread, as these conditions may affect the removal technique. A well-prepared workspace with adequate lighting and tools within reach helps maintain a smooth workflow.
Breaking the Bead with a Bead Breaker Tool
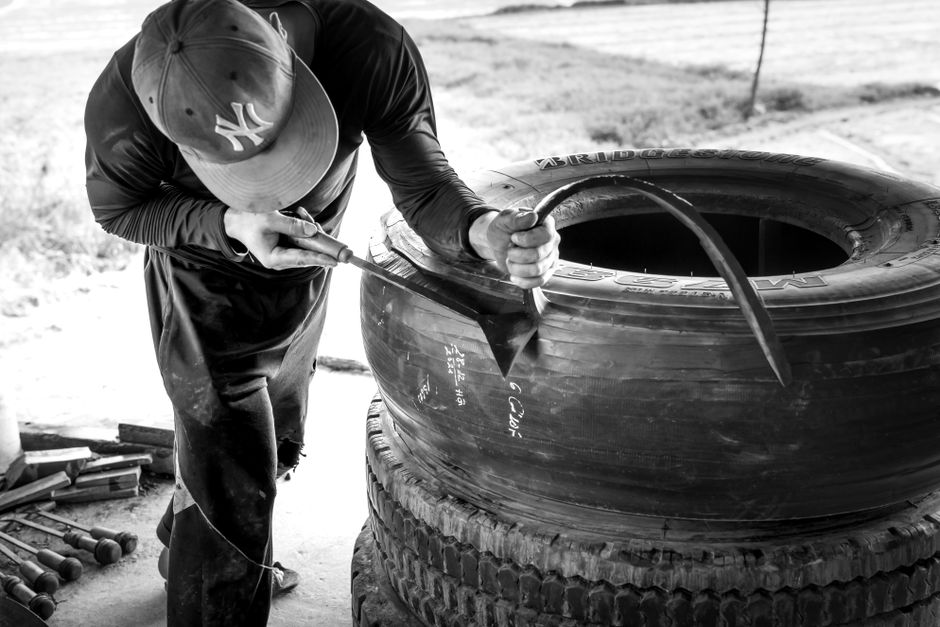
A bead breaker tool is designed to apply concentrated force to the tire sidewall near the rim flange, pushing the bead away from the rim. There are several types of bead breakers, including manual lever models, hydraulic units, and pneumatic tools. For truck tires, a hydraulic or pneumatic bead breaker is often preferred due to the higher force required. Regardless of the type, the tool’s shoe or jaw must be positioned so that it presses against the sidewall just above the rim, not on the rim flange itself.
The sequence typically begins by placing the bead breaker shoe on the sidewall at a point slightly offset from the valve stem to avoid damage. The force is applied gradually until the bead separates with a audible pop or a visible gap appears. If the bead does not break after several attempts, repositioning the tool a few inches along the circumference may help. It is common to break the bead on one side of the tire first, then rotate the assembly to break the other side. For dual-wheel configurations, each tire is handled separately.
Working around the tire sequentially is a method that distributes force evenly and reduces stress on any single area. Once the bead is loose on both sides, the tire can be lifted off the rim either manually or with a tire spreader. If the tire is particularly stubborn, applying additional lubricant and waiting a few minutes can allow the lubricant to penetrate the bond. The goal is to separate the bead without cutting or tearing the rubber, as a torn bead can compromise the seal of the new tire. After removal, the rim should be cleaned of any residual rubber or debris before mounting the new tire.
Seating the New Tire Bead Without Damaging the Rim or Sidewall
Seating a new truck tire involves aligning the bead over the rim and then inflating the tire to force the bead into its final position against the bead seat. Before starting, the rim must be lubricated along the bead seat and the rim flange area. The new tire’s bead should also receive a coating of mounting lubricant, which reduces friction and helps prevent the bead from folding or pinching during inflation. It is important to use enough lubricant but not so much that it pools or drips into the wheel cavity.
The first step is to place the tire onto the rim at an angle, ensuring that the bottom bead is seated in the drop center of the rim. The drop center is the recessed groove in the middle of the rim that provides clearance for the bead to pass over the rim flange. For truck rims, which are often multi-piece or designed with a deep well, the tire must be worked onto the rim carefully. A tire mounting machine with a swing arm or a manual tire spoon may be used to guide the upper bead over the flange without forcing it.
Once the tire is positioned, inflation begins slowly. The purpose of slow inflation is to allow the bead to rise evenly. If a tire is inflated too quickly, the bead may jump over the rim flange or become trapped in a folded position, leading to a dangerous situation. As the tire inflates, the beads will move outward and eventually snap into place against the rim flanges. This seating event is often accompanied by a loud pop, indicating that the bead has sealed. The inflation should continue to the recommended pressure, which is typically stamped on the tire sidewall or provided by the vehicle manufacturer.
After seating, the tire should be checked for proper alignment by inspecting the bead line—a small molded ridge on the sidewall—that should be equidistant from the rim flange around the entire circumference. An uneven gap may indicate that the bead is not fully seated or that the rim has a defect. In such cases, deflating the tire, repositioning it, and reinflating may resolve the issue. It is never advisable to exceed the maximum inflation pressure listed on the tire, as overinflation can cause bead failure or rim distortion.
Final Checks and Safety Considerations
Once the tire is seated and inflated, a visual inspection of the entire assembly is recommended. The sidewall should show no bulges, cuts, or signs of cord exposure. The rim flanges should be straight and free of new dents. For tubeless truck tires, a soapy water spray can be applied to the bead area to detect any air leaks. Small bubbles indicate that the seal is not complete, and the tire may need to be deflated and reseated. In some cases, slight adjustments can be made by manipulating the tire while partially inflated, but this should be done with caution.
Balancing the tire after mounting is a separate process that helps ensure smooth rolling and even wear. While not part of the bead seating procedure, balancing is typically performed after the tire is mounted and inflated. The wheel assembly should also be torqued to the manufacturer’s specifications when reinstalled on the vehicle. Using a torque wrench helps avoid under- or over-tightening, which can affect bead sealing and wheel integrity.
The entire procedure relies on the technician’s familiarity with the tools and the specific tire and rim combination. Variations in bead design, rim material, and tire age can influence how easily the bead seats. If difficulties arise, consulting the tire or rim manufacturer’s guidelines can provide model-specific recommendations. Working methodically and avoiding shortcuts contributes to a process that protects the equipment and minimizes the likelihood of rework. By following a structured approach and using the proper lubricants and bead breaker tool, the task of changing a truck tire bead can be completed with greater confidence in the outcome.